402 Payment Required HTTP status code. On Injective EVM, where payments settle in a single block (approximately 650ms), x402 turns any API endpoint into a pay-per-request service without API keys, subscriptions, or registration.
x402 payment with USDC on Injective (1 min) - YouTube
In this tutorial, you will:
- Understand how x402 integrates payment into the HTTP protocol
- Use the x402 demo to fetch market data gated behind a 0.01 USDC x402 payment
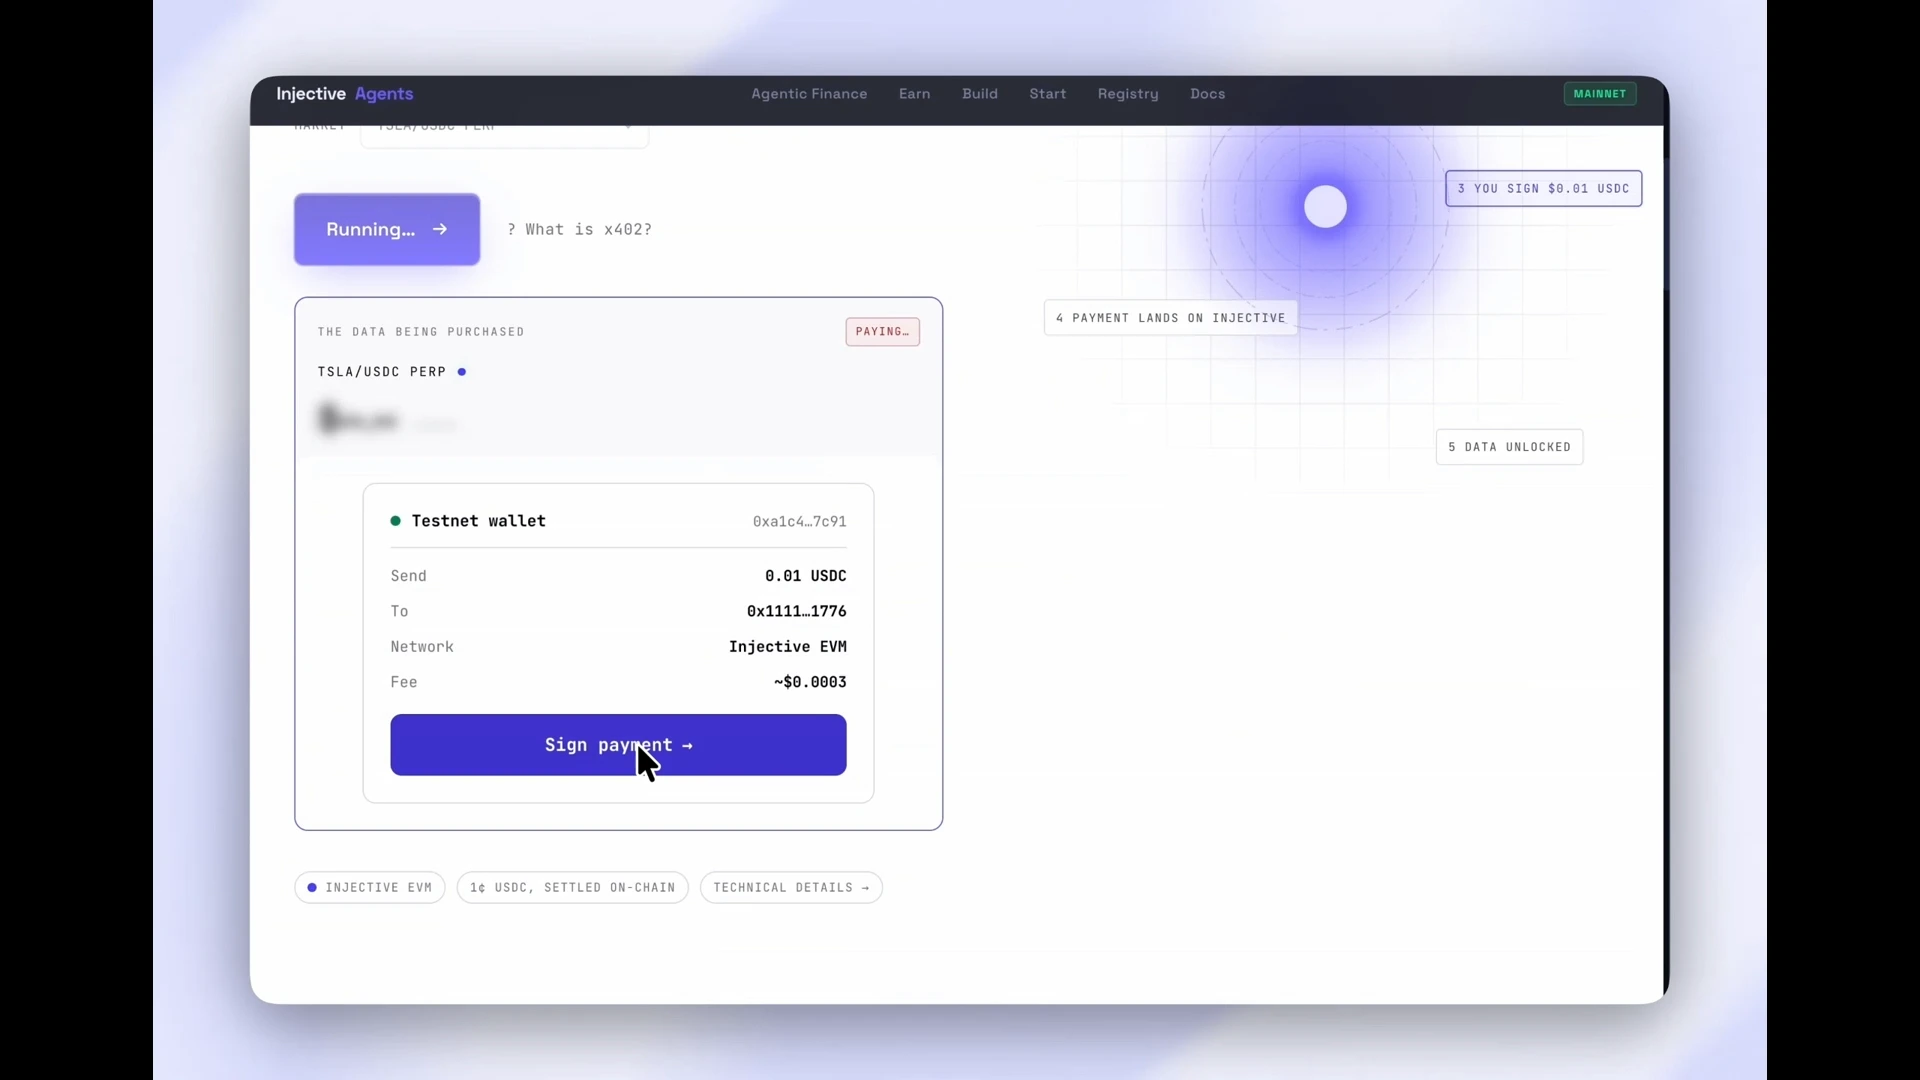
- Manually sign and settle an on-chain USDC payment from your EVM wallet
- Learn why x402 is a natural fit for autonomous AI agents
- Protect your own Express API endpoint with the
@injectivelabs/x402library
Prerequisites
You will also need:
- Your EVM wallet connected to the Injective network (mainnet or testnet)
- INJ tokens in your wallet for gas fees
- A small amount of USDC in your wallet (a few cents is sufficient for payments)
Getting started
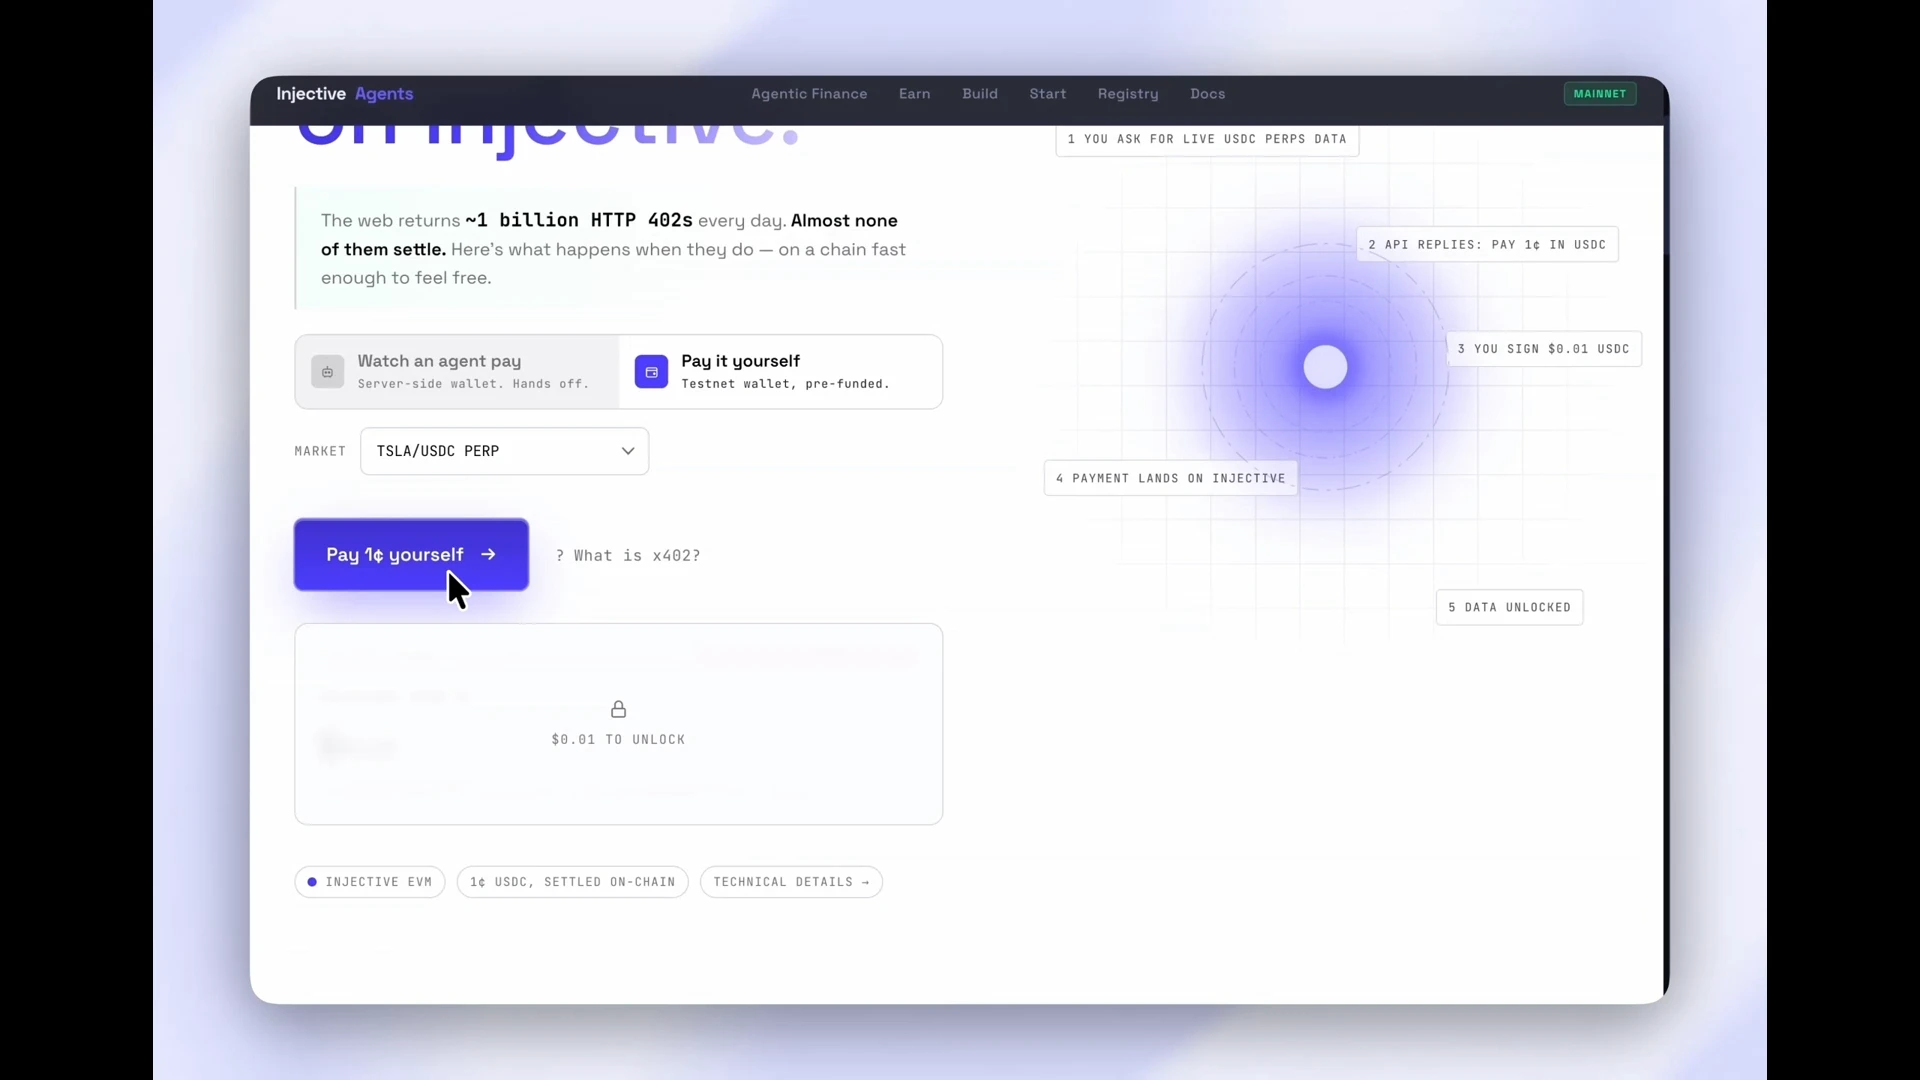
Open the x402 demo atagents.injective.com/x402 in your browser.
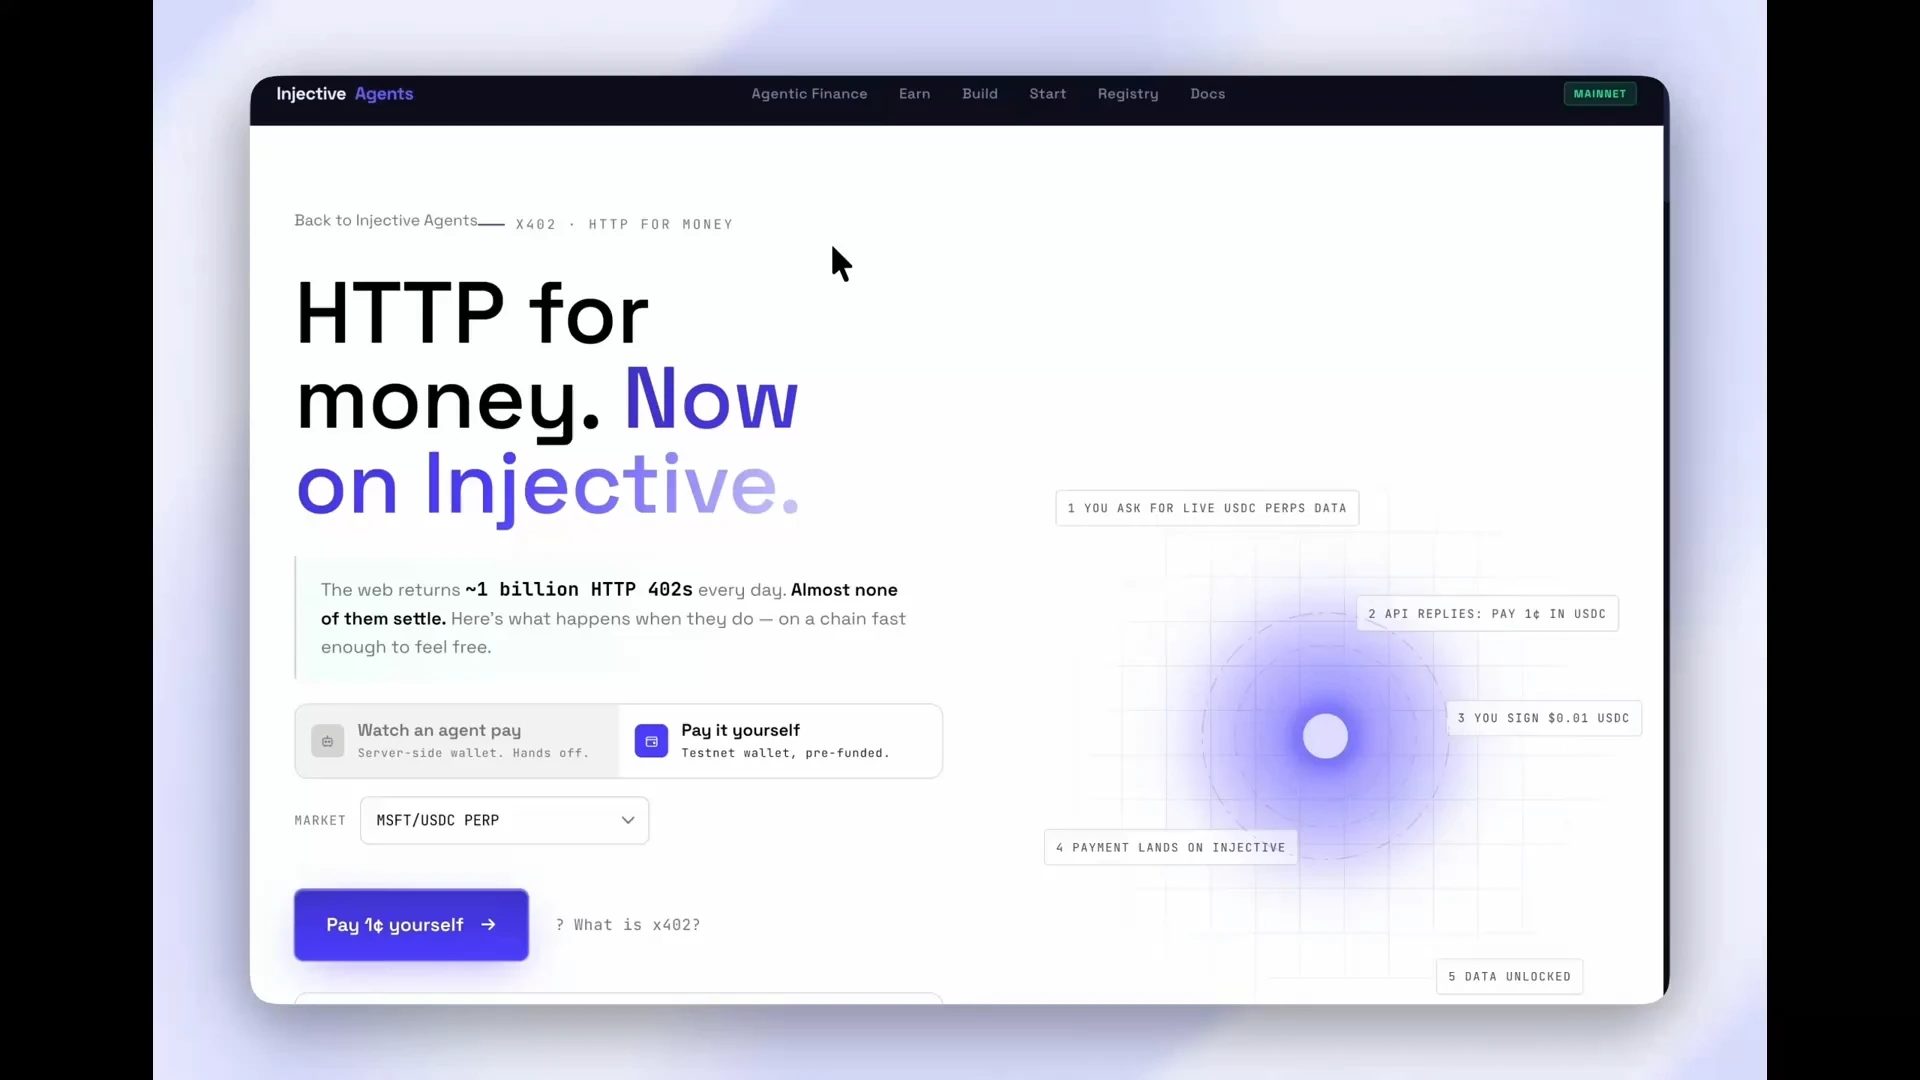
What is x402?
x402 embeds payment into the HTTP protocol, where the server demands and collects payment as part of the API response cycle, before returning data.What happens in an x402 interaction?
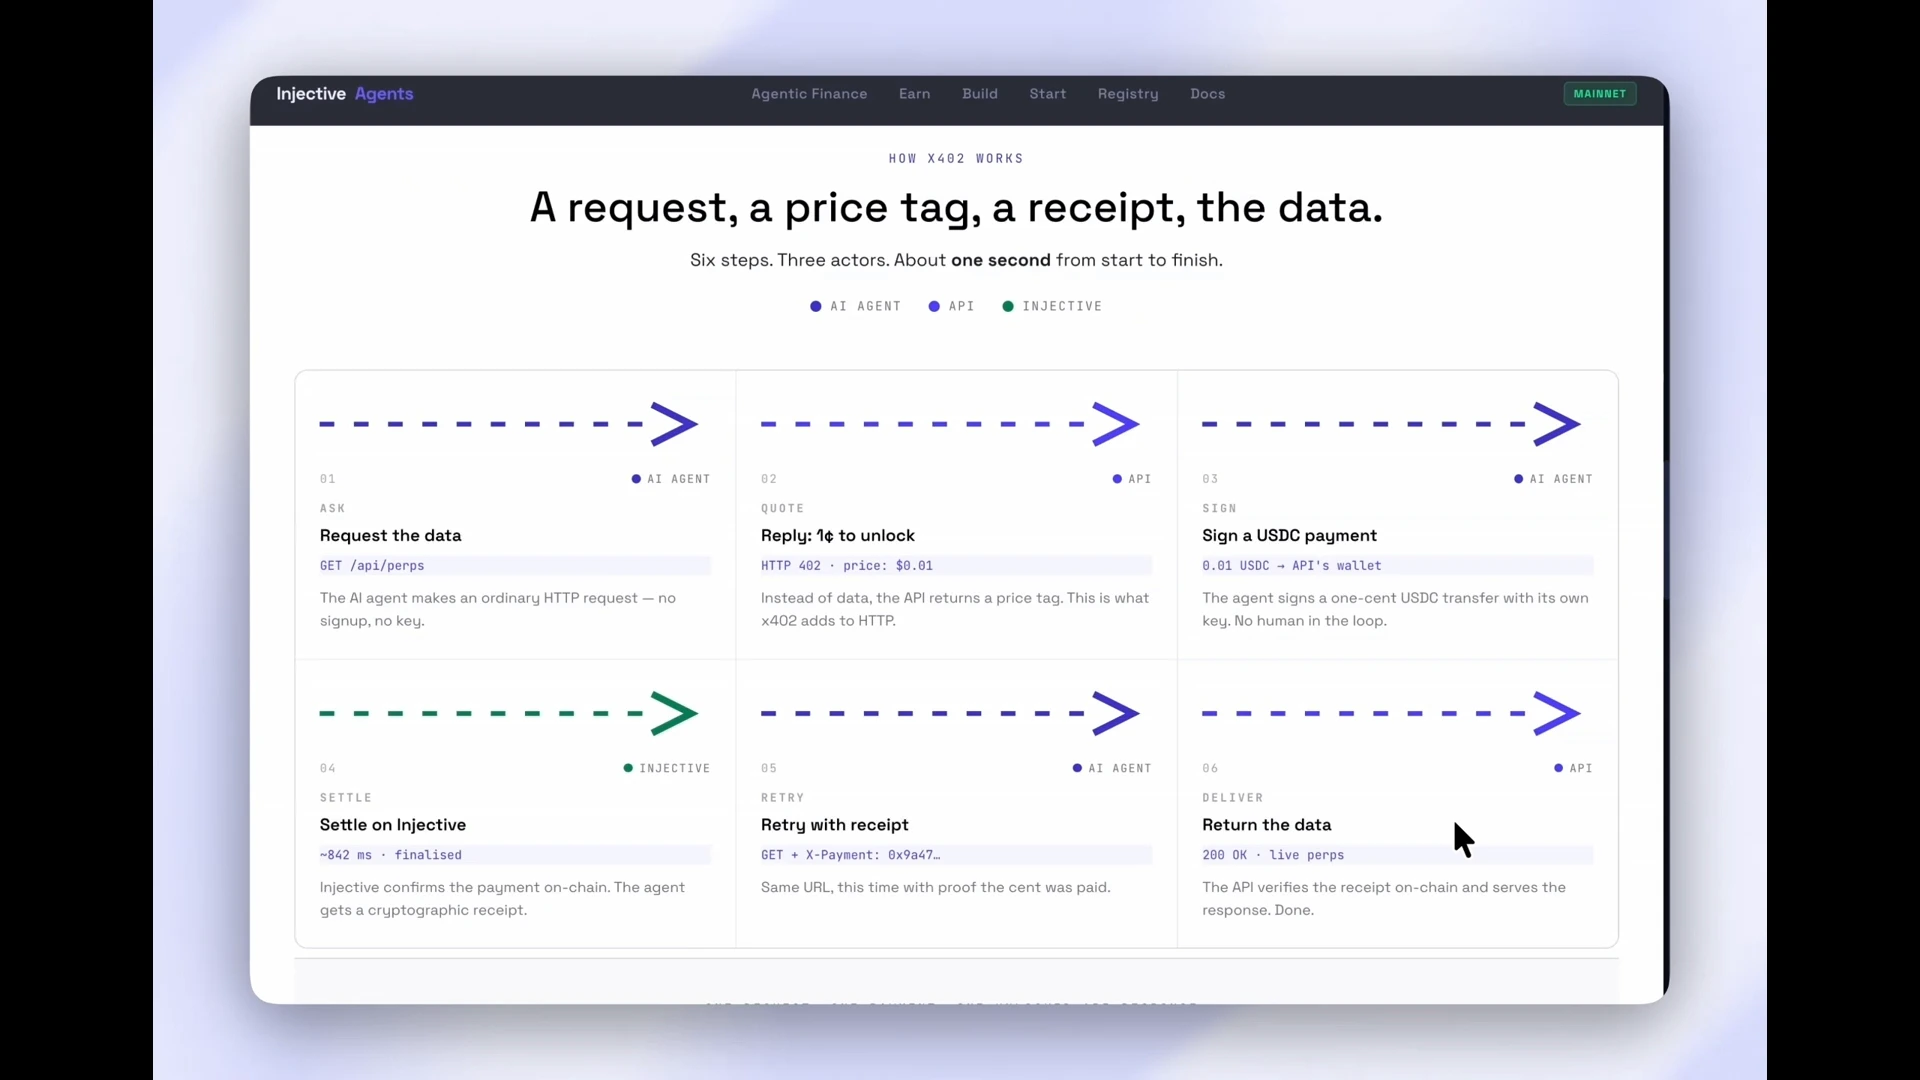
When a client calls an x402-gated HTTP endpoint, the exchange follows these steps:- Client sends a normal HTTP request to the API endpoint.
- Server responds with
402 Payment Requiredand a price quote. - Client signs a USDC transfer transaction, but the transaction is not yet broadcast to the network.
- An x402 facilitator submits the signed payment to the blockchain and awaits confirmation.
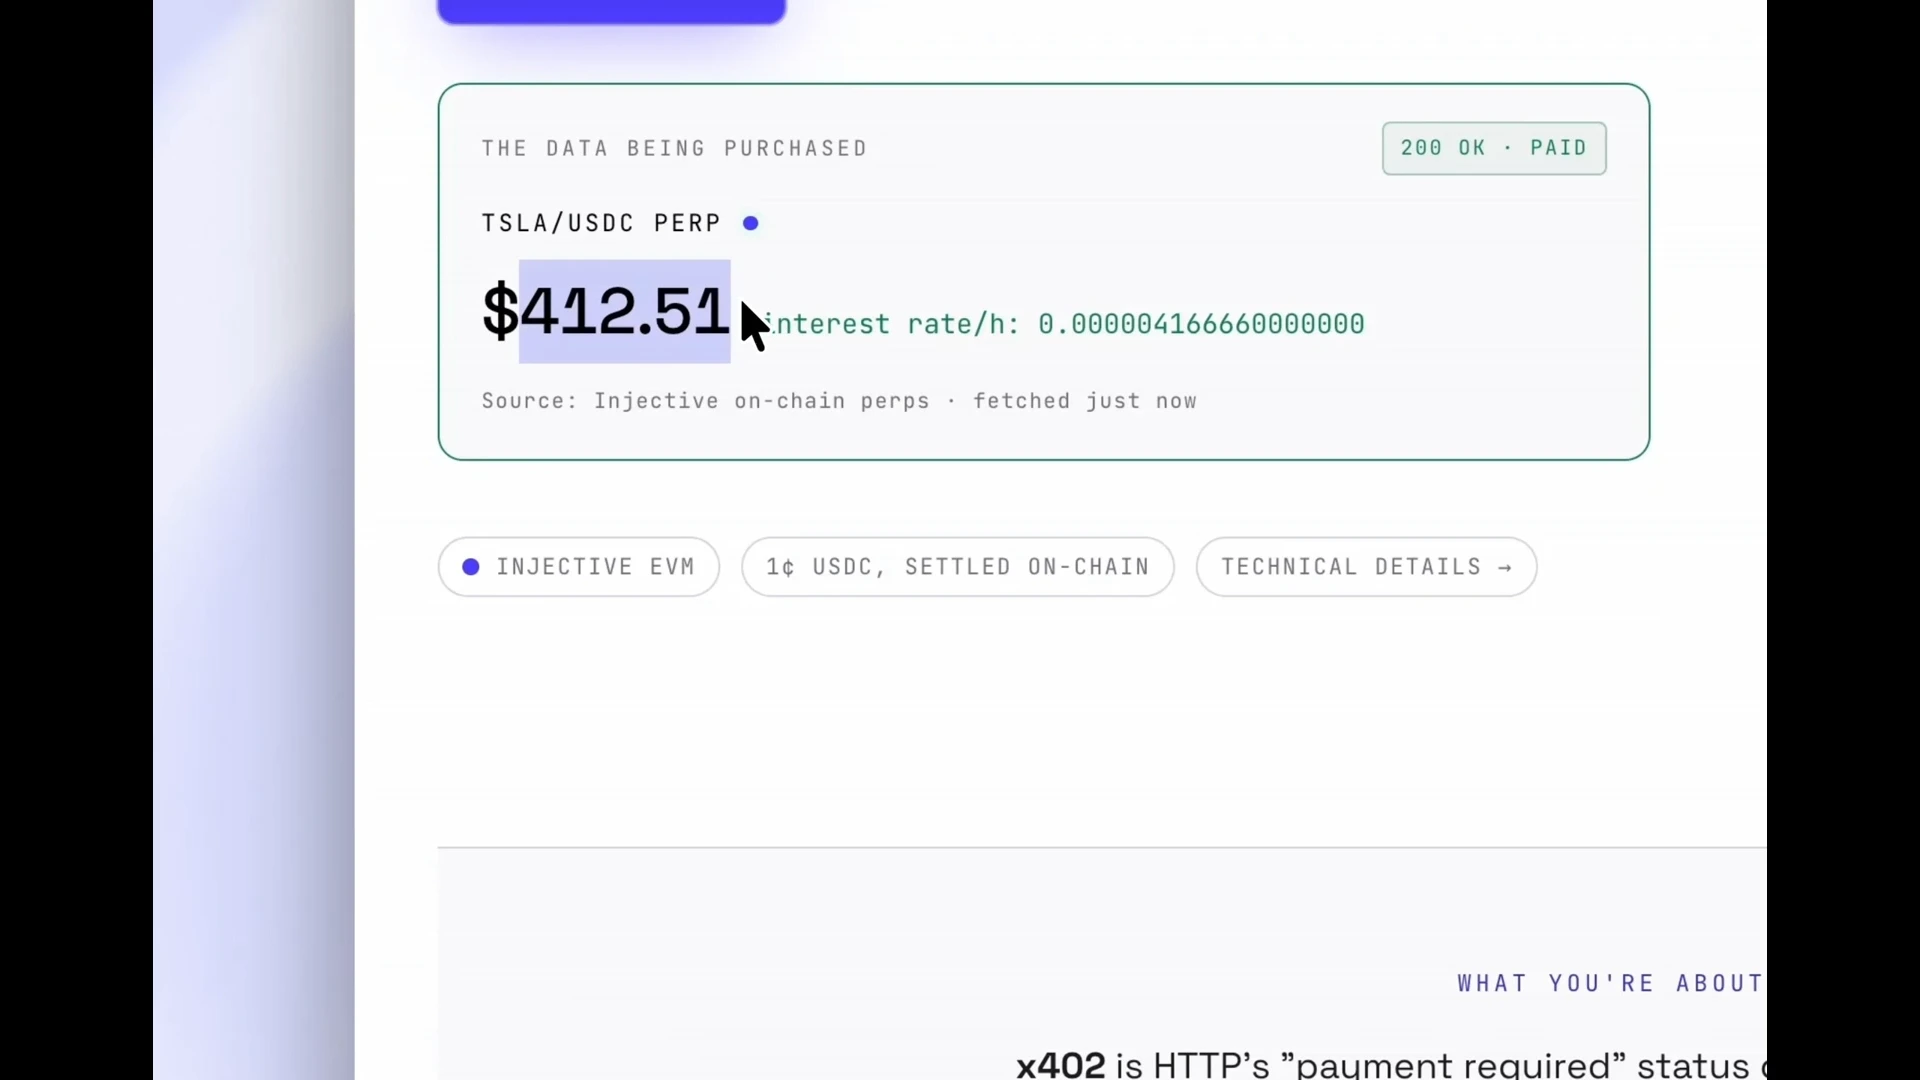
- Client retries the original request, this time including the details of the completed payment.
- Server verifies the receipt via the facilitator and returns the requested data.
What does x402 avoid?
Prior registration, API key management, subscriptions, or credit cards; none of these are needed. This means that a server can quote, verify payment, and deliver in a single HTTP conversation. The facilitator handles all blockchain interaction, keeping your API server web native:Is x402 only for Ethereum?
x402 is network-neutral: The open standard supports EVM-compatible networks, SVM-compatible networks, and others. This tutorial shows you how to use x402 on Injective.Why use x402 on Injective?
Injective has a very high throughput and low latency, as it has a block time of approximately 650ms, and deterministic single-block finality. This means that x402 payments can settle about as fast as credit card payments, but at a fraction of the cost. This opens up new use cases, including pay-per-use, and micro-transactions. Since x402 transactions are fully programmatic as well, they are a natural fit for AI agents.Manual x402 payment
Follow these steps to trigger the manual x402 payment flow, which lets you observe the wallet signing process: (1) Click “Pay it yourself” on the demo page.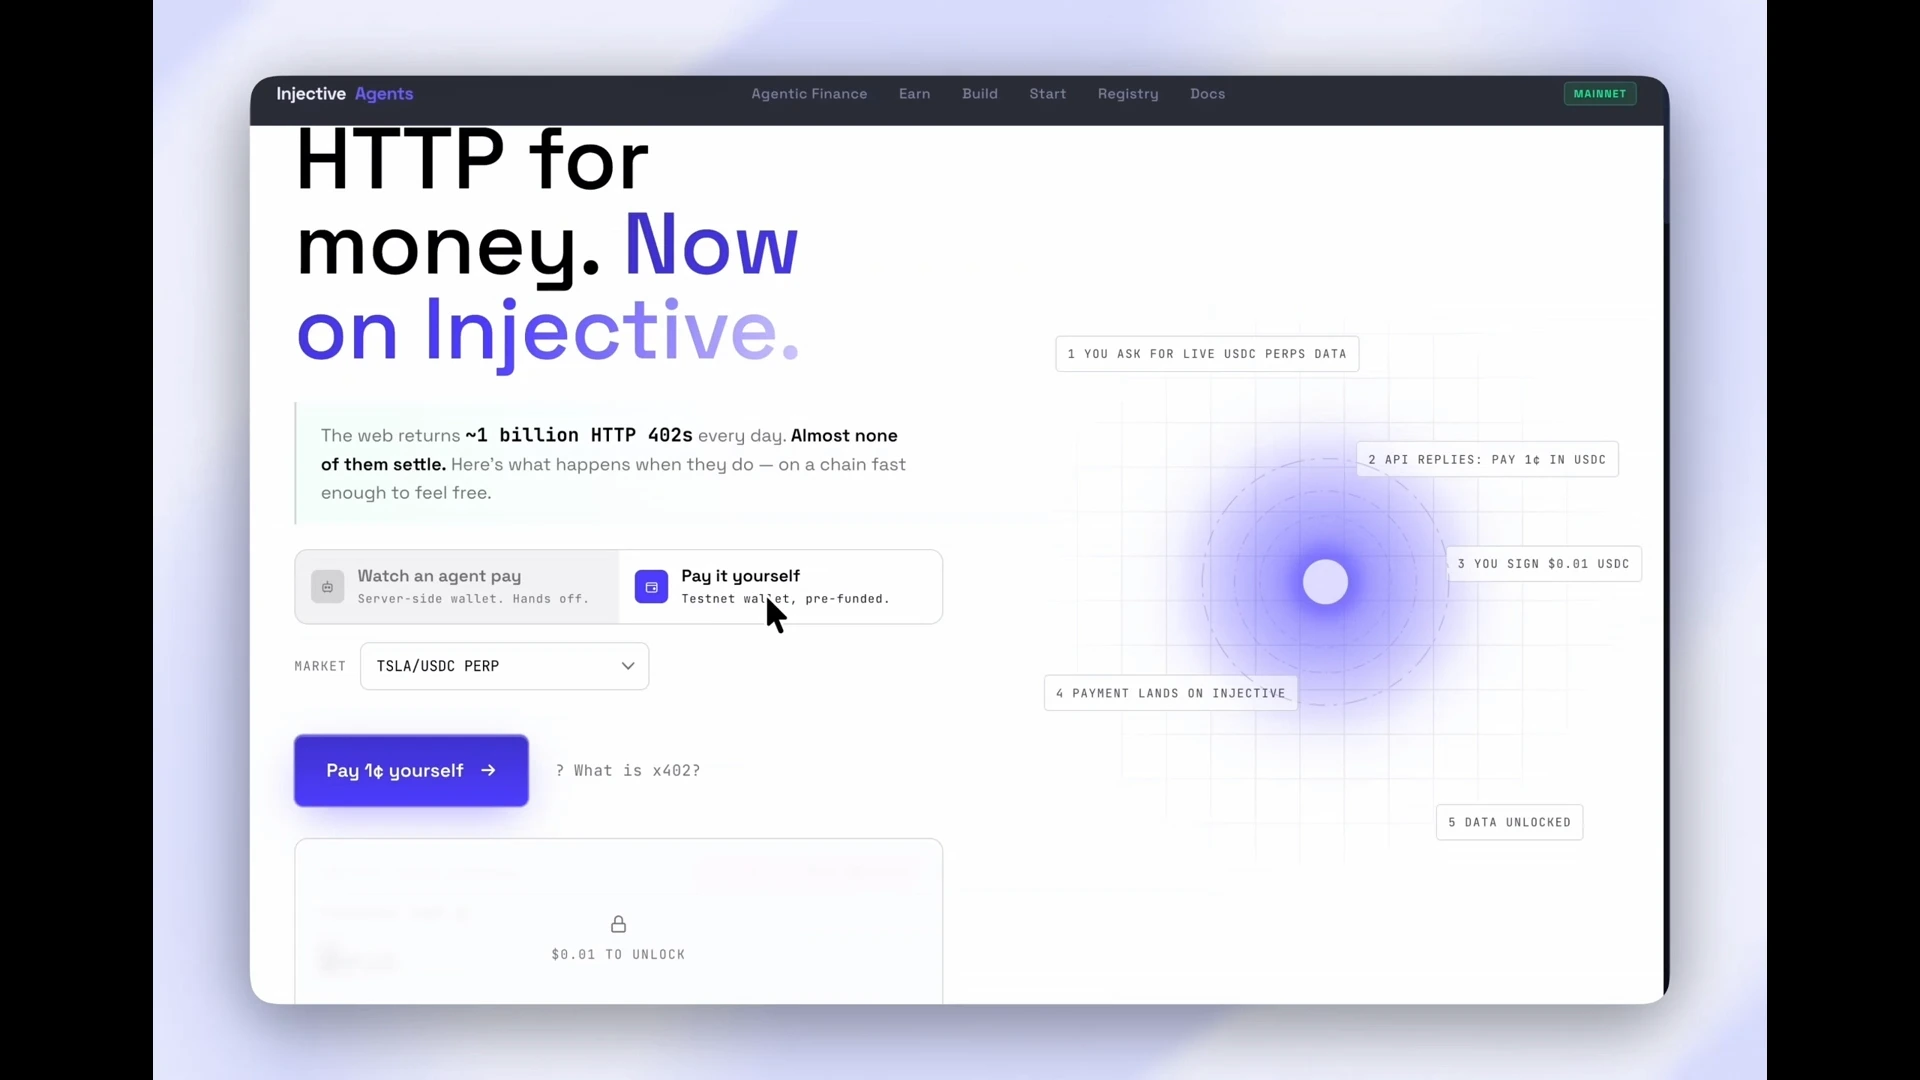
How does x402 enable agentic payments?
x402 enables APIs to be programmatically payable. This is a property that becomes essential when the caller is an AI agent rather than a human. Traditional billing models (API keys, OAuth flows, monthly subscriptions) require a human to set up and maintain credentials. When an AI agent operates autonomously or scales across many users, pre-registered credentials become a bottleneck and a security liability: Keys expire, quotas are shared, and every new service integration requires a human setup step. x402 removes that bottleneck. An agent that holds a USDC balance can call any x402-protected endpoint without prior registration. The API quotes the price, the agent signs the payment, and the data is returned programmatically. This is done per request, with on-chain receipts as an immutable audit trail. No human involvement is needed in individual API calls. On Injective, x402 provides the payment primitive that lets agents fetch market data, trigger transactions, and invoke services at runtime. No prior setup or actions need to be performed by humans.The x402 standard is open-source and network-neutral.
Coinbase originated it, and open to any network for implementation.
View the x402 protocol documentation for the full standard.
Protecting your own API endpoint with x402
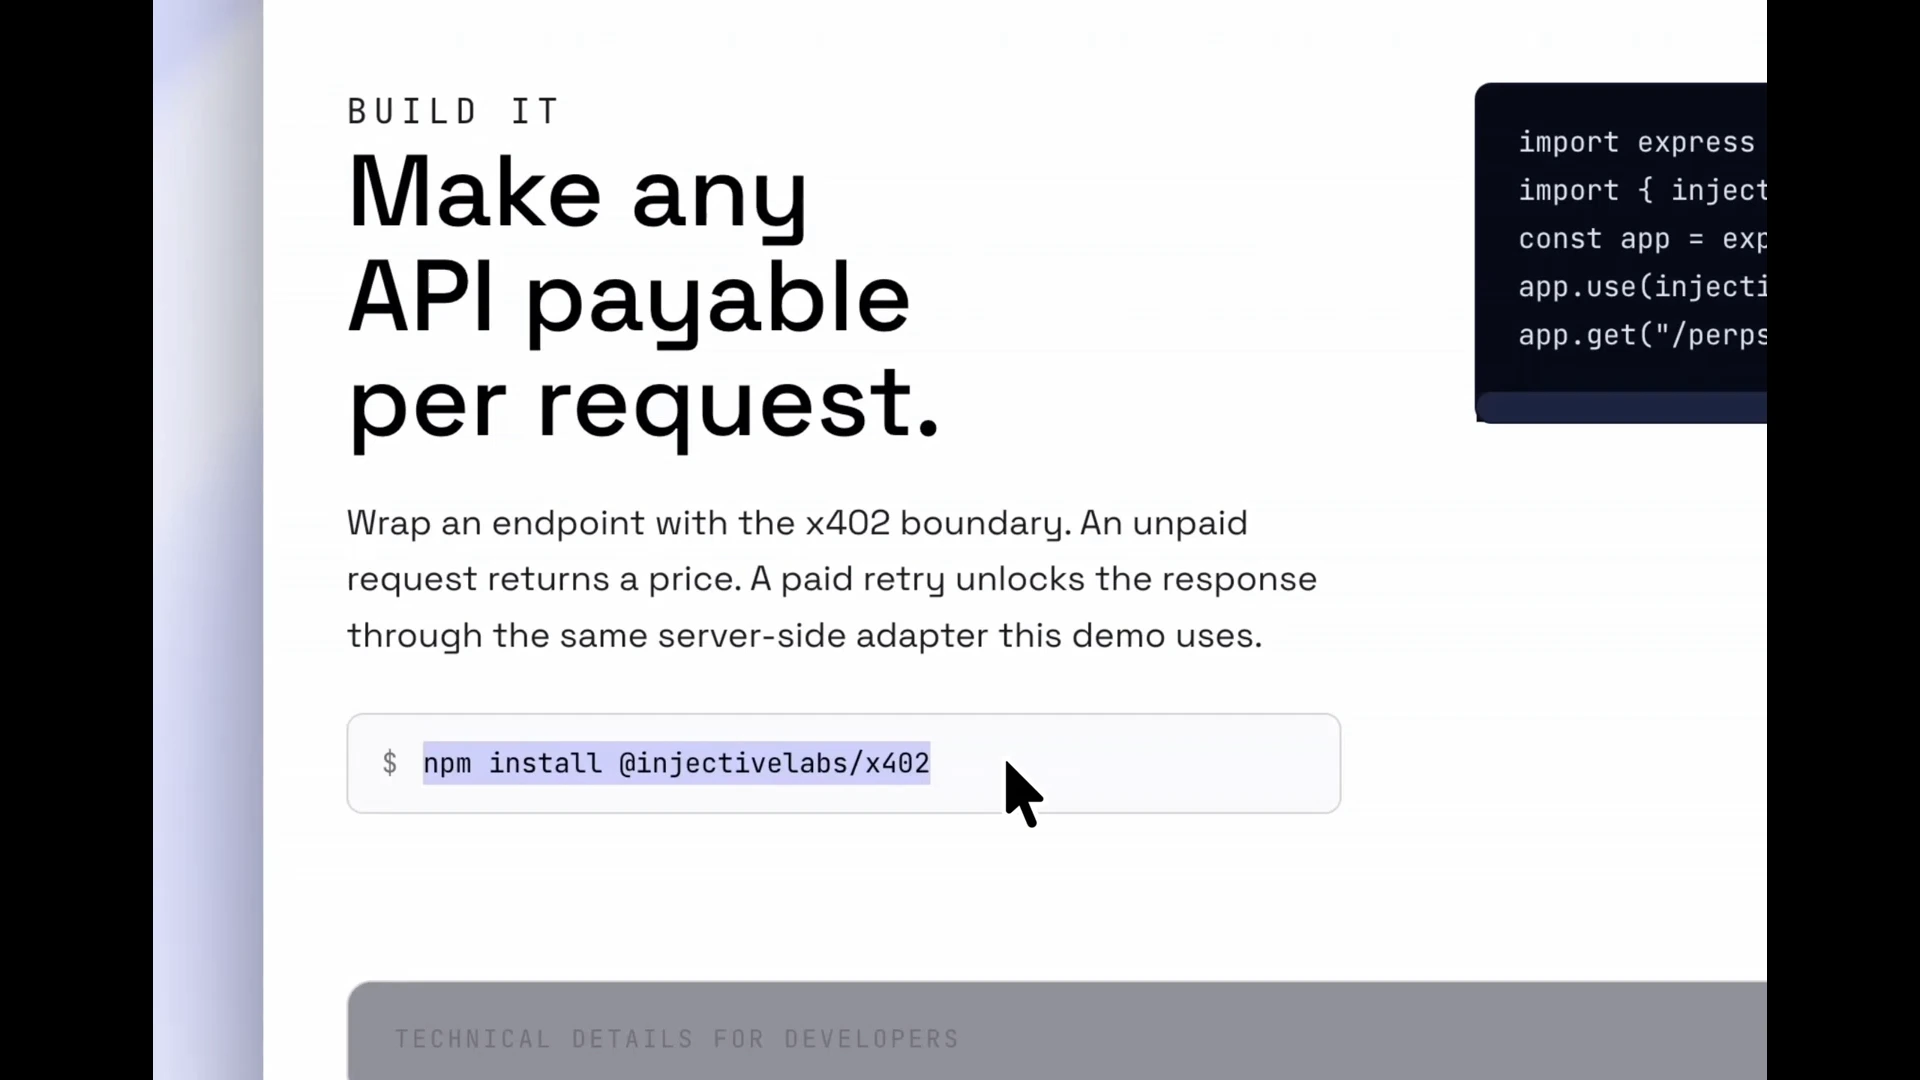
- Navigate to your project directory (or create a new one with
npm init -y). - Install the x402 library by running
npm install @injectivelabs/x402in your terminal. - Create
server.jsand importexpressandinjectivePaymentMiddlewarefrom@injectivelabs/x402/middleware. - Call
injectivePaymentMiddlewarein your middleware stack, specifying the endpoint to protect, the payment network, the USDC asset address, and the amount in the smallest unit.
Any HTTP client that presents a valid USDC payment receipt header
(including an AI agent) will receive the response.
You do not need to implement API keys or even user accounts on your server.
Next steps
Congratulations! You have used the x402 protocol to pay for an API request on Injective EVM, and have seen how to protect your own endpoint with a single middleware call. Here is what you learned:- How x402 uses the HTTP
402 Payment Requiredstatus code to gate API responses - How the facilitator abstracts RPC, gas, and signature verification from your server
- How to trigger and sign an x402 USDC payment using the demo and your EVM wallet
- Why x402 is a natural fit for AI agents that call APIs programmatically
- How to add
injectivePaymentMiddlewareto an Express server
- x402 protocol specification: The open standard this library implements
- AI developers on Injective: Tools and skills for building AI-native applications on Injective
- Injective EVM documentation: EVM development on Injective